A-Frame Electrical & Wiring: The Complete Guide
Planning electrical systems in an A-Frame: sizing the panel, running cable through sloped walls, loft lighting, and safety essentials.
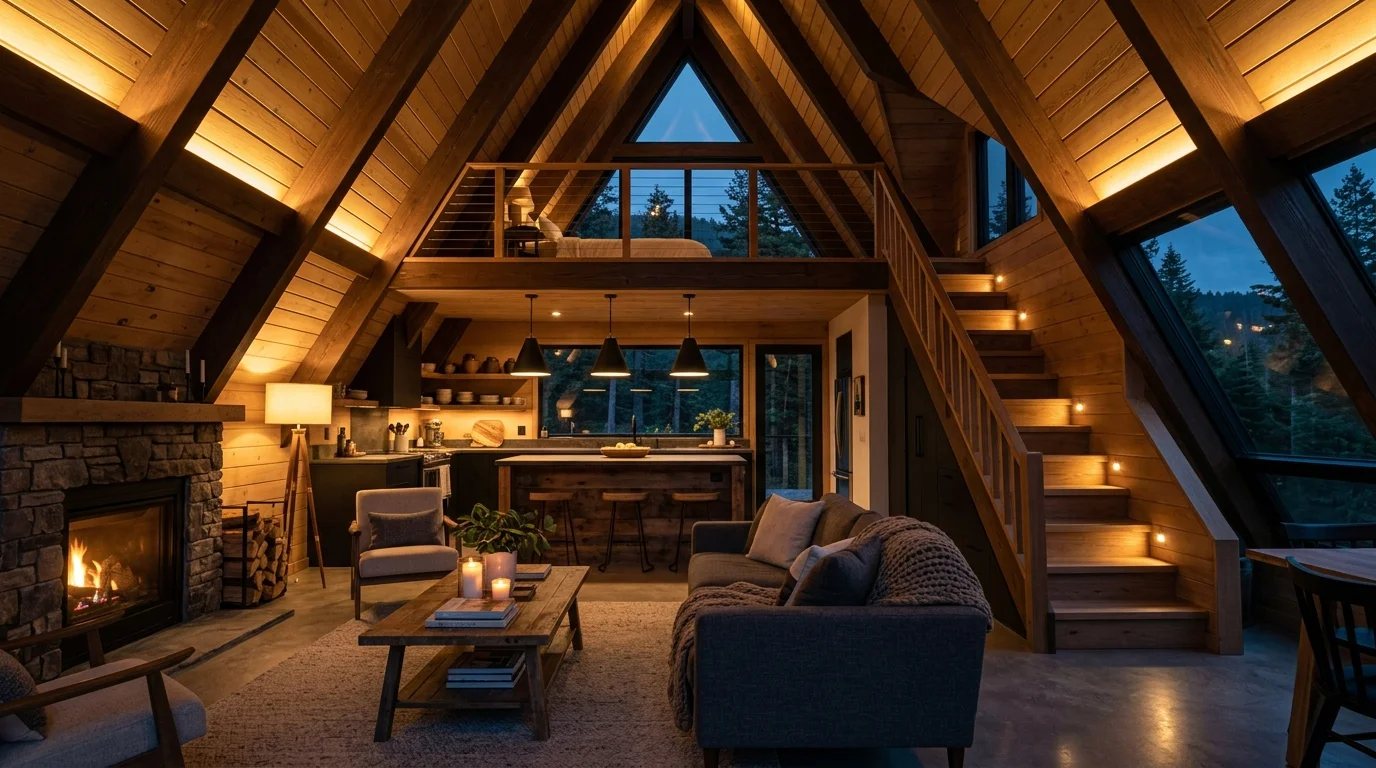
An A-Frame house is electrically unlike any conventional home. There are no tall vertical stud walls to bury cables in, the living space is often a single open volume that soars to the peak, and many A-Frames sit on remote or off-grid plots where every watt counts. That combination means the wiring layout has to be planned on paper long before the first cable is pulled. Get it right and you have a clean, safe, easy-to-service installation. Get it wrong and you are chasing cables behind finished cladding. This guide walks you through loads, panel sizing, the sloped-wall challenge, lighting a tall open space, outlet placement, off-grid integration, and safety.
Planning loads and sizing the panel
Start by listing every load the cabin will carry. A typical compact A-Frame draws on lighting, general sockets, a water heater, some form of space heating or a heat pump, and a small kitchen. Add these up honestly, because undersizing the supply is the most common and most expensive mistake.
Typical cabin loads
| Load group | Typical demand |
|---|---|
| LED lighting (whole house) | 0.3–0.6 kW |
| General sockets | 2.0–3.5 kW |
| Water heater (80–150 L) | 2.0–3.0 kW |
| Air-source heat pump | 1.5–3.0 kW |
| Kitchen (hob, oven, appliances) | 3.0–7.0 kW |
For a grid-connected A-Frame, a single-phase 230 V supply of 40–63 A is usually enough for a 50–70 m² cabin, while an all-electric home with a heat pump and electric hob benefits from a three-phase 400 V connection. Off-grid, the picture flips: you size the inverter and battery to the loads, and you actively design to keep peak demand low. Our off-grid living hub covers system sizing in depth.
The consumer unit (main panel) should have 30–50% spare ways for future circuits. A sensible starting plan for a small A-Frame is: two lighting circuits, three to four socket circuits, dedicated circuits for the water heater, heat pump, hob and oven, plus one outdoor/deck circuit.
The sloped-wall challenge
This is the defining problem. A conventional house hides cables inside vertical stud cavities; an A-Frame's main "walls" are the sloping rafters that also form the roof. You cannot simply drop a cable down a wall.
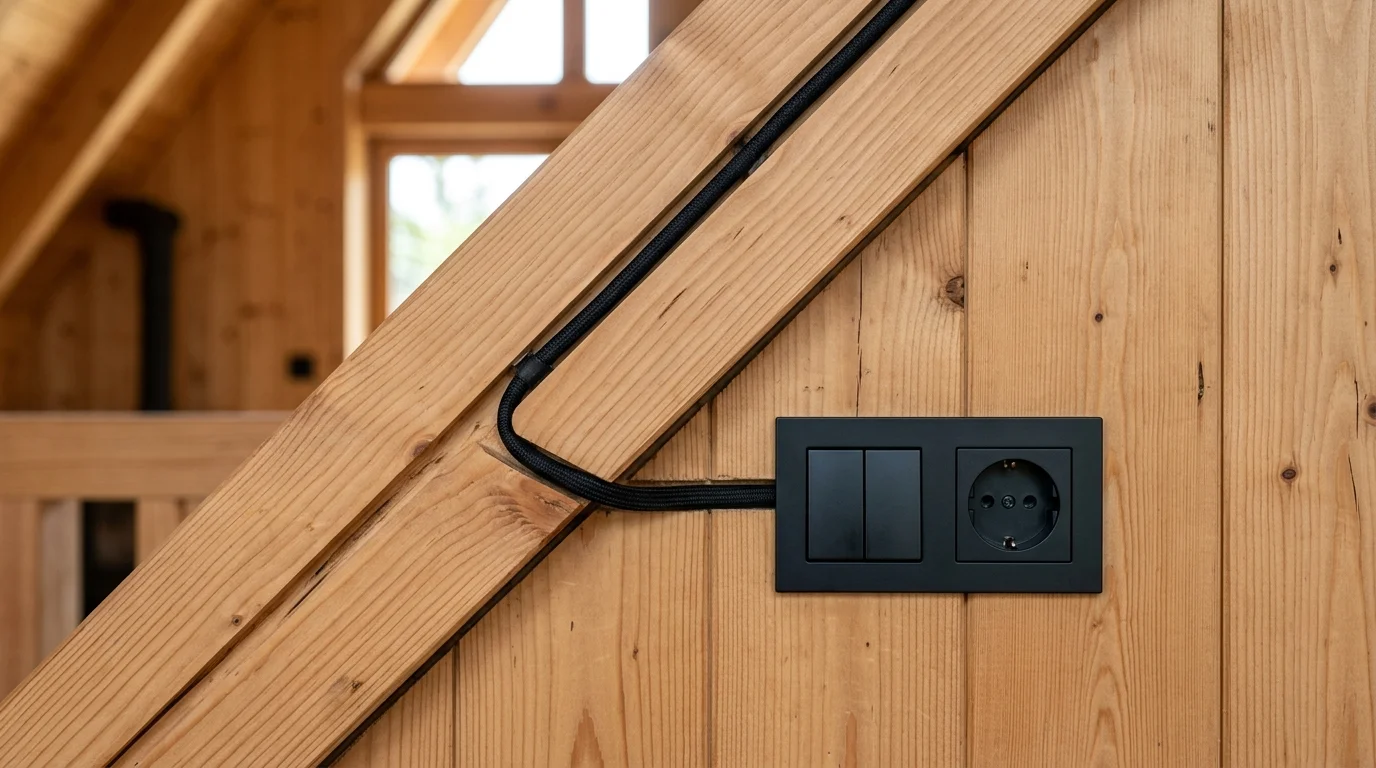 Concealed electrical conduit and minimalist switches routed along timber rafters
The proven solutions are to run cables along or behind the rafters in the insulation void, to build a dedicated service chase at the base of the slope, or to use knee walls — the short vertical walls where the rafter meets the floor, which create genuine cavities for boxes and cabling. Whichever you choose, plan conduit runs and position accessible junction boxes before insulation and interior cladding go up. Once the boards are on, every mistake means cutting into finished surfaces. Leaving 20 mm conduit as spare capacity now saves major work later. The framing and cavity strategy is covered in our A-Frame building guide.
Lighting a tall open volume and the loft
A soaring ceiling is the signature of an A-Frame, and it needs layered lighting rather than one central fitting. Combine ambient, task, and accent light so the space works morning and night.
Warm layered architectural lighting in an open A-frame volume
Fixtures on the slope
Track lighting or tensioned cable lighting mounted along the rafters is ideal — it follows the slope and can be aimed. Wall and knee-wall sconces add warmth at low level where people actually sit. Avoid mounting fixtures at the very peak unless you have a plan to service them.
Controlling hard-to-reach fixtures
Any luminaire high on the gable is a nuisance to switch and to maintain. Use LED fittings rated for long life, and control them with smart switches or relays so you never need a ladder to flick them off. A smart-home setup pays for itself in an A-Frame. Give the loft its own lighting circuit with a switch at both the top of the stairs and the sleeping area.
Outlets and placement
Open-plan A-Frames lack the perimeter of walls a normal house uses for sockets. Put outlets in the knee walls around the edge, and use floor boxes in the middle of open living areas so a sofa or dining table is not stranded far from power. In the kitchen and bathroom, provide dedicated circuits protected by GFCI/RCD devices, and keep at least one weatherproof outlet on the deck. Plan for USB-C outlets near beds and seating; in a compact cabin they reduce clutter.
Integrating solar, battery and a generator
Many A-Frames run partly or wholly off-grid. A typical system pairs roof or ground-mounted panels with a battery bank, an inverter/charger, and a backup generator for winter or long cloudy spells. The generator and the solar/battery source must never feed the panel at the same time, so a transfer (changeover) switch is essential. Set clear priorities: solar charges the battery first, the inverter serves the loads, and the generator starts only when the battery falls below a set threshold. Size everything around your real daily energy use in kWh. Panel selection and yields are covered in our A-Frame solar guide. If you are building the whole cabin yourself, the DIY A-Frame cabin guide shows how the electrical fits into the wider build sequence.
Safety and code
Every final circuit must be protected by an RCD/GFCI (30 mA for socket and bathroom circuits). Provide a proper earthing/grounding system with an electrode at the base of the structure, and consider arc-fault protection (AFDD) — particularly valuable in a timber building where a hidden fault could smoulder. In remote areas, never work on a live installation alone, isolate and lock off before opening any box, and keep a means of calling for help. Timber, insulation and open volumes all raise the stakes if a fault goes unnoticed.
Sample circuit schedule
| Circuit | Breaker | Cable | Purpose |
|---|---|---|---|
| Lighting – ground floor | 10 A | 1.5 mm² | Living, kitchen, bathroom lights |
| Lighting – loft | 10 A | 1.5 mm² | Loft and stair lighting |
| Sockets – general | 16 A | 2.5 mm² | Living/bedroom outlets |
| Sockets – kitchen | 16 A (RCD) | 2.5 mm² | Worktop appliances |
| Water heater | 16 A | 2.5 mm² | 80–150 L heater |
| Heat pump | 16–20 A | 2.5–4 mm² | Space heating/cooling |
| Hob / oven | 20–32 A | 4–6 mm² | Kitchen cooking |
| Outdoor / deck | 16 A (RCD) | 2.5 mm² | Weatherproof sockets, lights |
Frequently asked questions
Can I run the wiring myself in an A-Frame?
You can plan the routes, install conduit, pull cable and fit boxes yourself, and doing so during the build is genuinely easier than in a finished house. But the final connections to the panel and the grid must be made by a licensed electrician who will test and certify the installation to local code.
Where do I hide cables when there are no vertical walls?
Use the knee walls, a purpose-built service chase along the base of the slope, and the insulation void behind the rafters. Install conduit and accessible junction boxes before cladding, and leave spare conduit for future changes.
12 V DC or 230 V AC for an off-grid A-Frame?
For a small cabin used occasionally, 12/24 V DC lighting and USB can be simple and efficient. For anything with a water heater, heat pump or standard appliances, a 230 V AC system via an inverter is the practical choice. Many owners run a hybrid: DC for essential lights, AC for everything else.
Safety note: This guide is for planning. The final connections to the grid and the consumer unit, plus testing and certification, must be carried out by a licensed electrician in accordance with your local electrical code.
Plan your A-Frame with confidence
Good electrical design starts with knowing your building's size, layout and energy needs. Use our A-Frame Planner calculator to estimate dimensions, loads and costs for your project, then take those figures to your electrician to turn a smart plan into a safe, certified installation.
Snow Load on A-Frame Roofs: Structural Safety Explained
How a steep A-Frame roof carries snow: load calculations in kg/m², sizing rafters, critical zones, and why a 60° pitch helps snow slide off.
The Shared Cabin Playbook
A weekend cabin is at its best when an ordinary moment becomes easier to enjoy. For this topic, that moment is three households arriving with different expectations about supplies, cleaning…
A-Frame vs Conventional House: A Head-to-Head Comparison
A-Frame or a conventional house? We compare cost, build speed, usable space, energy efficiency, maintenance, and resale to help you decide.