A-Frame Bathroom: A Guide to the Compact Wet Room
How to design and build a bathroom in an A-Frame: layout under the sloped roof, moisture and ventilation, a compact wet room, finishes, and plumbing.
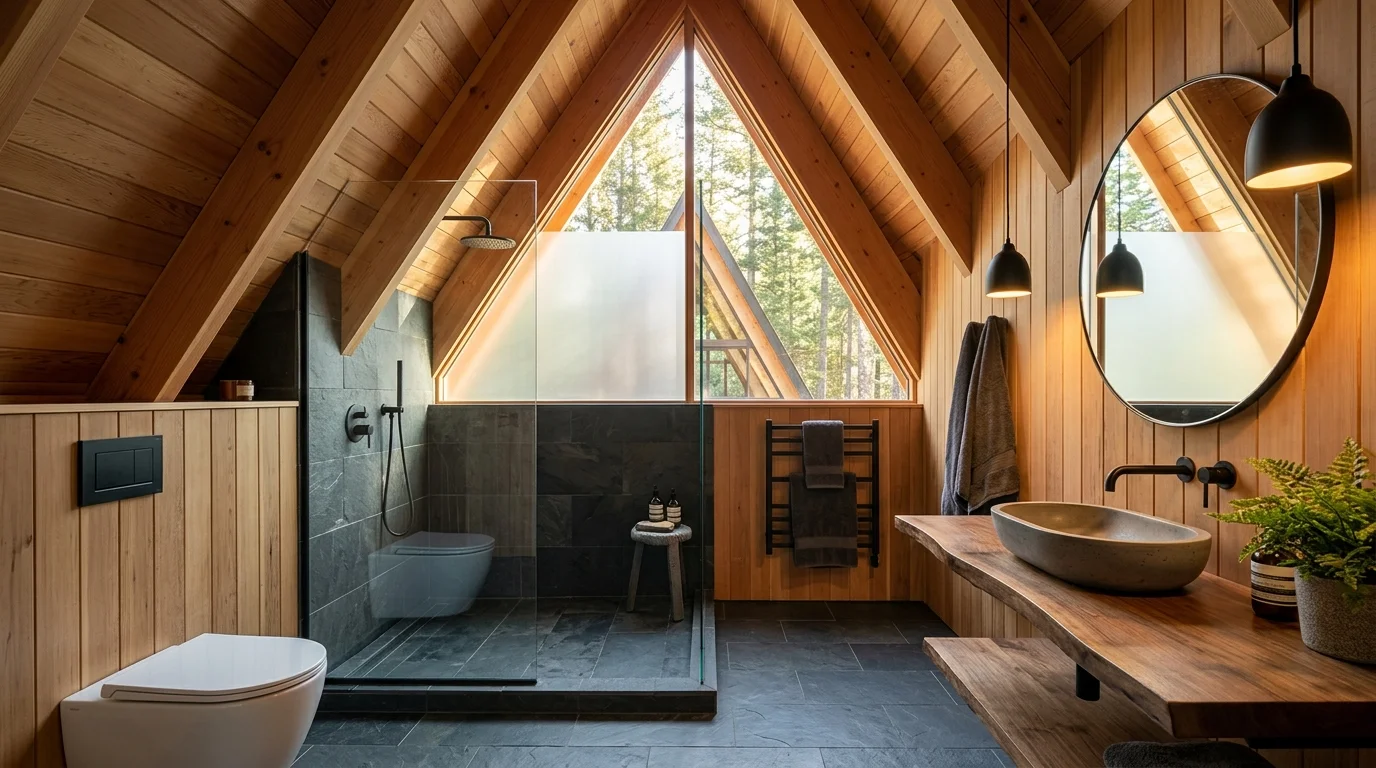
Designing a bathroom within the unique architectural constraints of an A-Frame house is an exercise in creativity and precision. The defining characteristic of these beautiful structures—the steeply pitched roof that reaches all the way to the foundation—presents immediate challenges when it comes to spatial planning and head clearance. Unlike a conventional home where you have uniform ceiling heights across every room, the A-Frame forces you to think vertically and strategically. Bathrooms, by their very nature, require functionality, moisture management, and a certain degree of comfort. When placed under a sloped roof, every single square centimetre must be calculated with care. A well-designed compact wet room can turn these architectural limitations into an opportunity for a cozy, highly efficient, and beautifully finished space.
Strategic Positioning and Head Clearance
The most critical decision you will make when designing your A-Frame bathroom is its physical location within the floor plan. Due to the aggressive slope of the walls, you cannot simply place a shower in the corner or near the eaves as you might in a traditional house. Instead, the bathroom must be positioned where the ceiling remains sufficiently high. Usually, this means placing the shower closest to the central axis of the cabin or utilizing the gable ends where the walls are vertical.
A shower requires a minimum clear height of 200 cm to be comfortable and compliant with most building standards. Anything less, and you risk creating an uncomfortable and claustrophobic experience. When planning the layout, place the toilet and perhaps a low vanity sink under the sloping sections where full standing height is not strictly necessary. The shower enclosure must command the highest point in the room. This strategic placement not only ensures comfort but also dictates the overall flow of the bathroom. Consider drawing a section plan early in your design process to understand exactly how the roof pitch interacts with human ergonomics. When designing multi-level A-Frames, you may also need to coordinate the bathroom location with your loft stairs to optimize the central volume.
Designing the Compact Wet Room
To maximize the limited floor area, the most effective approach is to design the bathroom as a compact wet room. A wet room essentially treats the entire floor area as a shower tray. Instead of installing a bulky, separate shower tray or attempting to squeeze in a bathtub, you transition to a walk-in shower configuration. This creates a seamless floor surface that visually expands the room and physically eliminates tripping hazards.
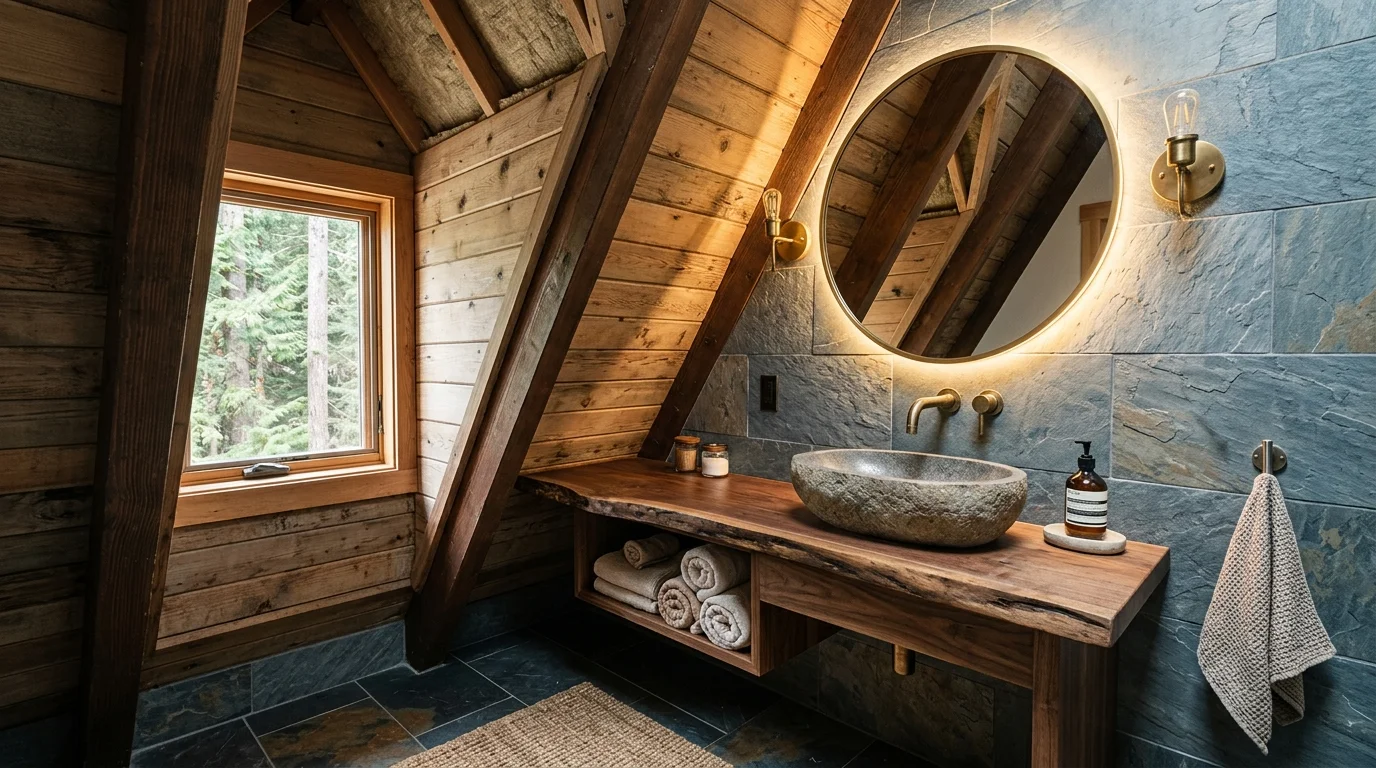 Compact custom wood vanity and vessel sink tucked under the A-frame roof slope
In a wet room, the floor must be gently sloped towards a linear drain, which efficiently manages water runoff without requiring complex, multi-directional slopes. Floor-to-ceiling tiling is highly recommended in this setup to protect the structural integrity of the walls. By removing the visual barriers of shower curbs or bulky enclosures, you allow the eye to travel across the entire space, making the compact area feel significantly larger than its actual dimensions. A simple frameless glass panel can be used to prevent water from splashing onto the toilet or vanity without boxing in the shower area.
Moisture Management and Ventilation
One of the most insidious threats to an A-Frame structure is moisture, and the bathroom is the primary source. Because hot, moist air naturally rises, it can easily travel up into the apex of your A-Frame, potentially causing severe condensation issues, mould growth, and rot in the timber frame. Exceptional moisture management is not optional; it is an absolute necessity.
Walk-in slate wet room shower with frameless glass in an A-frame cabin
First and foremost, a mechanical extract fan is mandatory. Do not rely solely on an operable window, even if you have one. The fan should be ducted directly to the exterior and preferably linked to the light switch with a run-on timer to ensure it continues to clear the air after you leave the room. Behind the tiles, a continuous, high-quality vapour barrier must be meticulously installed. This prevents water vapour from penetrating the wall assembly and reaching the insulation. Furthermore, consider a high-level vent near the apex of the bathroom ceiling. This helps to purge the warmest, most humid air that gathers at the very top, preventing apex condensation and contributing to overall healthy indoor air.
Plumbing Infrastructure and Core Integration
Efficient plumbing design is about keeping pipe runs as short and direct as possible. In an A-Frame, where space is tight and running pipes through sloped walls can be highly complex, centralizing your services is key. Keep the bathroom directly above or adjacent to the home’s primary wet core, such as the kitchen or utility room.
Stacked plumbing—where bathrooms and kitchens share the same vertical wall for water supply and waste lines—drastically reduces material costs, minimizes the risk of leaks, and simplifies maintenance. Long horizontal pipe runs can be difficult to conceal and may compromise the structural integrity of floor joists if not planned correctly. For a deeper dive into optimizing your water systems and pipe layouts, consult our comprehensive plumbing guide. Keeping systems centralized also means faster hot water delivery, saving both water and energy over the lifespan of the cabin. To blend the plumbing aesthetics with the rest of the home, review our interior design overview.
Selecting the Right Finishes
When it comes to finishes, the materials you choose must perform flawlessly in a high-moisture environment while enhancing the aesthetic appeal of the compact space. Large-format tiles are an excellent choice for A-Frame bathrooms. Because they require fewer grout lines, they are significantly easier to clean and maintain. Visually, fewer intersecting lines create a cleaner, more expansive look, which is beneficial in smaller spaces.
If you want to introduce texture or visual interest, consider using mosaic tiles as an accent—perhaps in a niche within the shower or as a backsplash behind the vanity. However, keep the main surfaces simple. As an alternative to full tiling, you might also consider waterproof wall panels. These modern panels come in a variety of finishes, including realistic stone or wood textures, and offer a completely seamless, grout-free installation. They are often faster to install and provide robust waterproofing when properly sealed.
Comparing Bathroom Finishes
When budgeting for your A-Frame bathroom, understanding the performance and cost of different finishes is crucial. Here is a breakdown of common options:
| Finish Type | Durability | Rough Cost (€ per m²) | Installation Notes |
|---|---|---|---|
| Large-Format Ceramic Tile | High | 25€ - 50€ | Requires perfectly flat substrate; heavy. |
| Porcelain Tile | Very High | 40€ - 80€ | Extremely water-resistant; harder to cut. |
| Mosaic Tile Accents | Medium | 60€ - 120€ | Labor-intensive; high grout maintenance. |
| Waterproof Wall Panels | High | 50€ - 90€ | Fast installation; totally grout-free. |
| Natural Stone (Sealed) | Medium-High | 80€ - 150€ | Needs regular resealing; very heavy. |
FAQ
What is the minimum ceiling height for a shower in an A-Frame?
For a comfortable and standard-compliant shower, you need a minimum clear vertical height of 200 cm. You should position the shower head and standing area closest to the centre of the A-Frame where the ceiling is highest, reserving the lower sloped areas for the toilet, vanity, or built-in storage.
How do I prevent mould in a bathroom with no window?
Preventing mould requires aggressive moisture extraction. You must install a high-capacity mechanical extract fan wired to a run-on timer, ensure a perfect vapour barrier behind the walls, and consider a high-level vent to prevent humid air from trapping at the ceiling apex.
Can I fit a freestanding bath in an A-Frame bathroom?
Yes, but it requires careful spatial planning. A freestanding bath can be tucked under the sloped eaves where full standing height is not needed, making excellent use of otherwise dead space. However, ensure the floor structure is reinforced to handle the immense weight of a filled tub.
Plan Your A-Frame Build
Designing the perfect wet room is just one part of your overall cabin planning. From calculating material costs for finishes to estimating structural elements, getting your budget right is essential. Use our free A-Frame Calculator to estimate your construction costs, compare design choices, and start bringing your dream cabin to life today.
A-Frame Loft & Staircase Design Guide
How to use the height of an A-Frame roof: loft design, stair choices, safe headroom, railings, and smart storage under the slopes.
Smart A-Frame Home: Automation and IoT for Your Cabin
How to fit an A-Frame with smart systems: remote heating, security, humidity sensors, and energy monitoring for a home that isn't used every day.
An A-Frame Acoustics Guide
A good A-frame guide starts with observation, not a universal prescription. Consider a lively dinner turning into an exhausting conversation under an open roof volume. The cabin’s location…